Walk into any authentic Sichuan restaurant, and you’ll likely be greeted by the fragrant, numbing aroma of mala, a flavor profile that’s as complex as it is fiery. For many Westerners, the first encounter with genuinely spicy Chinese food can be an eye-opening, and sometimes mouth-searing, experience. This often leads to the broad assumption that all Chinese food packs a powerful punch.
The reality, however, is far more nuanced. China is a vast country with a culinary landscape as diverse as its geography. While some regions are famous for their liberal use of chilies and peppercorns, many others feature mild, subtle, and sweet flavors. Understanding this diversity is key to appreciating the depth of Chinese cuisine.
This guide will walk you through the world of spicy Chinese food. We’ll explore which regional cuisines bring the heat, identify the key ingredients that create those signature spicy flavors, and highlight some must-try dishes for every tolerance level. By the end, you’ll be able to navigate any Chinese menu with confidence and find the perfect dish to match your palate.
The Geography of Spice in China
China’s culinary traditions are often divided into eight major cuisines, each originating from a different region. Not all of them are known for spiciness. In fact, Cantonese cuisine from the south is celebrated for its mild, fresh flavors, while Jiangsu cuisine from the east is known for its sweetness and delicate cooking methods.
So, where does the heat come from? The spiciest food in China is primarily found in the inland provinces, where the humid climate and historical factors made chilies a popular ingredient.
Sichuan Cuisine (Sìchuān Cài, 川菜)
When people think of spicy Chinese food, they are usually thinking of Sichuan cuisine. Hailing from the southwestern province of Sichuan, this style of cooking is famous for its bold, pungent, and fiery flavors. But to simply call it “spicy” would be an oversimplification.
The defining characteristic of Sichuan cooking is the málà (麻辣) flavor profile.
- Má (麻): This refers to the unique, numbing, tingling sensation produced by the Sichuan peppercorn (huājiāo). It’s not spicy in the traditional sense but creates a pins-and-needles feeling on the tongue that prepares the palate for the heat to come.
- Là (辣): This is the fiery heat delivered by various types of dried and fresh chili peppers.
The combination of má and là creates a layered, aromatic, and addictive spiciness that is unlike anything else. The numbing effect of the peppercorns actually makes it possible to handle more chili heat, allowing the other complex flavors of the dish to shine through.
Hunan Cuisine (Xiāng Cài, 湘菜)
Travel east from Sichuan and you’ll arrive in Hunan province, another region renowned for its spicy food. Hunan cuisine, however, offers a different kind of heat. It is known for its gān là (干辣), or “dry spiciness.”
Unlike Sichuan food, Hunan cooking uses fewer Sichuan peppercorns, so it lacks the signature má numbing effect. Instead, the focus is purely on the intense, smoky heat of fresh and pickled chili peppers. Vinegar is also a key ingredient, which adds a sour note (suān là, 酸辣) that balances the chili’s intensity. Hunan dishes are often described as having a more straightforward, fiery kick that hits you immediately.
Chongqing Cuisine (Yú Cài, 渝菜)
While technically part of Sichuan province until 1997, the megacity of Chongqing has its own distinct culinary identity. Chongqing cuisine takes the málà concept and dials it up to eleven. It is often considered even spicier than traditional Sichuan food, with a more liberal use of chili oil, chili peppers, and Sichuan peppercorns. The city is the birthplace of the legendary Chongqing hot pot, a communal dish where diners cook meats and vegetables in a cauldron of boiling, fiery broth.
Other Spicy Regions
While Sichuan, Hunan, and Chongqing are the undisputed kings of spice, other regions also have their own fiery dishes.
- Guizhou Cuisine (Qián Cài, 黔菜): Known for its unique suān là (sour and spicy) flavors, Guizhou cooking heavily features pickled chilies and vegetables, creating a complex, tangy heat.
- Yunnan Cuisine (Diān Cài, 滇菜): Located on the border of Southeast Asia, Yunnan cuisine incorporates a wide array of fresh herbs, flowers, and mushrooms. Its spiciness is often fresh and fragrant, influenced by its proximity to countries like Thailand and Vietnam.
The Essential Ingredients of Spicy Chinese Food
The incredible diversity of spicy flavors in Chinese cuisine comes from a select group of potent ingredients. Understanding them is the first step to appreciating their impact on a dish.
Sichuan Peppercorns (Huājiāo, 花椒)
Arguably the most unique ingredient in the Chinese spice arsenal, the Sichuan peppercorn is not actually a peppercorn. It’s the pinkish-red husk of the prickly ash shrub. Its primary contribution to a dish is not heat but the má sensation—that signature numbing, tingling feeling. The active compound, hydroxy-alpha-sanshool, interacts with nerve receptors in your mouth, creating a vibration-like effect. This numbing quality reduces the pain from chili heat, allowing you to appreciate a wider range of flavors in the dish.
Chili Peppers (Làjiāo, 辣椒)
Chilies are not native to China. They were introduced by Portuguese traders from the Americas in the late 16th century. However, they were quickly adopted in regions like Sichuan and Hunan, where their warming properties were believed to combat the damp, cold climate.
Chinese chefs use a wide variety of chili peppers, both fresh and dried, to build layers of heat:
- Facing Heaven Chilies (Cháotiān Jiāo): Small, conical, and moderately hot, these are often used dried in Sichuan dishes like Kung Pao Chicken to impart a fragrant, smoky heat.
- Erjingtiao Chilies: A milder, longer chili that is prized for its deep red color and fruity aroma. It’s a key ingredient in creating vibrant, fragrant chili oil.
- Pickled Chilies (Pào Jiāo): Fresh red chilies are brined in a salty, sometimes sour liquid. They are fundamental to the “fish-fragrant” (yúxiāng) flavor profile and add a tangy, spicy kick to many dishes.
Chili-Based Condiments
Beyond whole peppers, Chinese cuisine relies on a variety of chili-based pastes and oils to deliver flavor and heat.
- Chili Bean Paste (Dòubànjiàng, 豆瓣酱): Known as the “soul of Sichuan cuisine,” this is a fermented paste of broad beans, soybeans, salt, and chilies. The most famous version comes from Pixian county and has a deep, savory, umami-rich flavor with a moderate, lingering heat. It’s the backbone of dishes like Mapo Tofu.
- Chili Oil (Làjiāoyóu, 辣椒油): A staple condiment made by steeping dried chili flakes, Sichuan peppercorns, and other spices like star anise and cinnamon in hot oil. The result is a brilliantly red, aromatic oil that adds flavor, fragrance, and a mellow heat to everything from noodle dishes to dumplings.
- Chili Crisp (Lǎogānmā, 老干妈): This modern condiment has taken the world by storm. It’s a crunchy, savory chili oil filled with fried chilies, fermented soybeans, garlic, and onions. It offers a symphony of textures and flavors—spicy, savory, and addictively crunchy.
Must-Try Spicy Chinese Dishes for Every Palate
Ready to start your spicy journey? Here are some classic dishes, categorized by their heat level, to help you find your perfect match.
For the Cautious Explorer (Mildly Spicy)
- Kung Pao Chicken (Gōngbǎo Jīdīng, 宫保鸡丁): The authentic Sichuan version is a world apart from its Westernized counterpart. It features diced chicken stir-fried with peanuts, vegetables, and a handful of dried Facing Heaven chilies and Sichuan peppercorns. The flavor is a balanced dance of sweet, sour, and savory, with a gentle, fragrant málà that tingles rather than burns.
- Fish-Fragrant Eggplant (Yúxiāng Qiézi, 鱼香茄子): Don’t worry, there’s no fish in this dish. The name refers to a classic Sichuan flavor profile made with pickled chilies, garlic, ginger, and scallions. The result is a sweet, sour, and savory sauce with a mild spiciness that beautifully coats silky, braised eggplant.
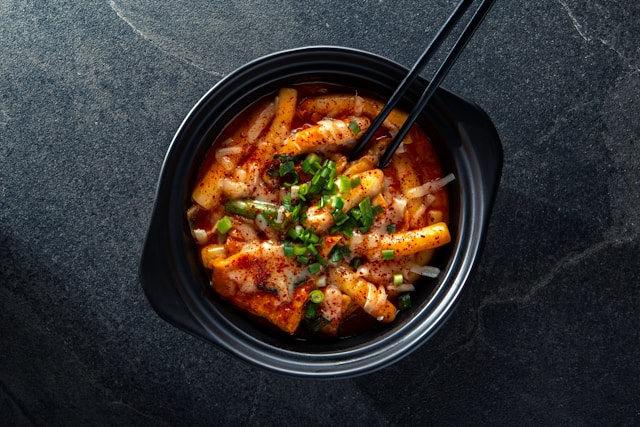
- Dan Dan Noodles (Dàndàn Miàn, 担担面): A classic street food snack, this dish consists of noodles served with a topping of seasoned minced pork, preserved vegetables, and a sauce made from chili oil, Sichuan peppercorns, and sesame paste. You can often control the heat by deciding how much chili oil to mix in.
For the Adventurous Eater (Moderately Spicy)
- Mapo Tofu (Mápó Dòufu, 麻婆豆腐): This is perhaps the most iconic dish of Sichuan cuisine. It features soft silken tofu suspended in a bright red, oily sauce made from fermented broad bean paste, ground beef or pork, and a generous amount of Sichuan peppercorns. It delivers a full-blast málà experience—numbing, spicy, and deeply savory.
- Dry-Fried Green Beans (Gānbiān Sìjìdòu, 干煸四季豆): Green beans are flash-fried until blistered and slightly wrinkled, then tossed with minced pork, pickled vegetables, garlic, ginger, and dried chilies. The “dry-frying” technique concentrates the flavors, creating a savory, spicy, and addictively crunchy dish.
- Spicy Cumin Lamb (Zīrán Yángròu, 孜然羊肉): Hailing from northern China but popular everywhere, this dish stir-fries thin slices of lamb with a heavy coating of cumin, dried chili flakes, and Sichuan peppercorns. The earthy flavor of the cumin combined with the bold heat makes for an intoxicatingly aromatic and powerful dish.
For the Fearless Foodie (Intensely Spicy)
- Chongqing Hot Pot (Chóngqìng Huǒguō, 重庆火锅): This is the ultimate test for spice lovers. A metal pot filled with a bubbling, fiery broth laden with dozens of dried chilies and Sichuan peppercorns sits at the center of the table. Diners dip thin slices of meat, vegetables, and tofu into the broth to cook. The heat is intense, unrelenting, and builds with every bite. It’s a communal, social, and sweat-inducing experience.
- Water-Boiled Fish (Shuǐzhǔ Yú, 水煮鱼): The name “water-boiled” is comically misleading. Silky fish fillets are poached in a broth, but then the entire dish is covered with a mountain of dried chilies and Sichuan peppercorns. Sizzling hot oil is poured over the top at the last minute, flash-frying the spices and releasing an explosion of fragrance and flavor. The result is a dish that is numbingly potent and intensely spicy.
- Spicy Chicken Cubes (Làzǐ Jī, 辣子鸡): This Chongqing specialty is a dish where you hunt for the chicken among the chilies. Bite-sized pieces of chicken are deep-fried until crispy, then stir-fried in a wok with an enormous pile of dried red chilies and Sichuan peppercorns. While it looks intimidating, most of the chilies are there for aroma, not for consumption. The chicken pieces absorb the fragrant, smoky heat, making them incredibly delicious and spicy.
A Universe of Flavor Awaits
Chinese food at Chong Qing Grilled Fish is not a monolith. Its relationship with spice is a story of geography, history, and incredible culinary creativity. While the fiery kitchens of Sichuan and Hunan have earned their spicy reputation, they represent just one corner of a vast and varied food landscape.
The best way to understand how spicy Chinese food can be is to taste it for yourself. Start with the milder dishes and work your way up. Pay attention to the different kinds of heat—is it the numbing tingle of má, the straightforward fire of là, or the tangy kick of pickled chilies?
By exploring this spectrum of spice, you’ll discover that heat in Chinese cuisine is never just about being hot. It’s a tool used to create balance, enhance aroma, and build layers of complex, unforgettable flavor.